![]()
![]()
![]()
![]()
|
|
|
|
|
Choose Device Settings > Network to open the Network Settings page. This is where LAN network settings are configured.
The current parameter settings are identified in the Current LAN Interface Parameters section of the page.
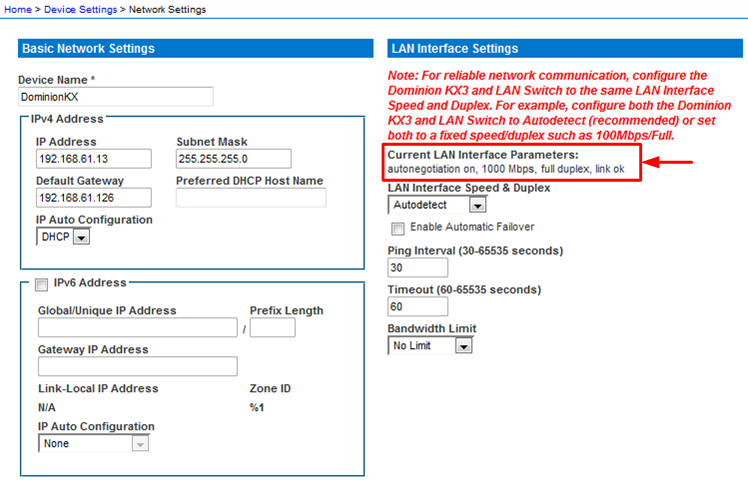
Update the LAN settings as needed.
Step |
|
|---|---|
|
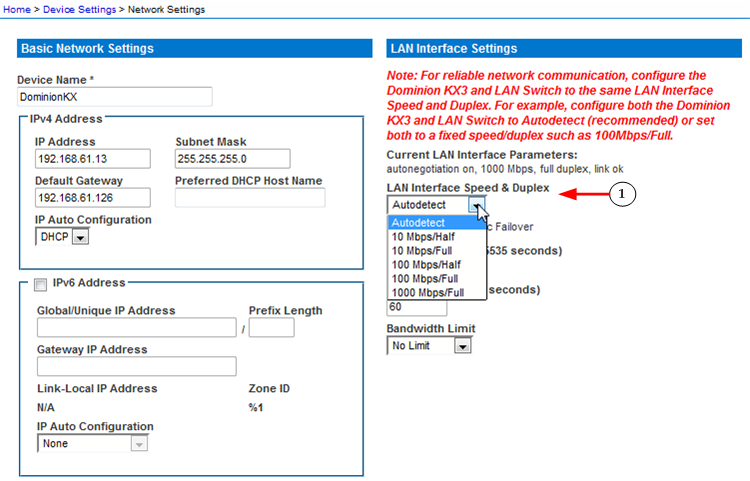
Choose the LAN Interface Speed & Duplex from the following options:
Note: Occasionally there are problems running at 10 Mbps in either half or full duplex. If you are experiencing problems, try another speed and duplex setting. See Network Speed Settings for more information. Click OK to apply the setting. |
Step |
|
|---|---|
|
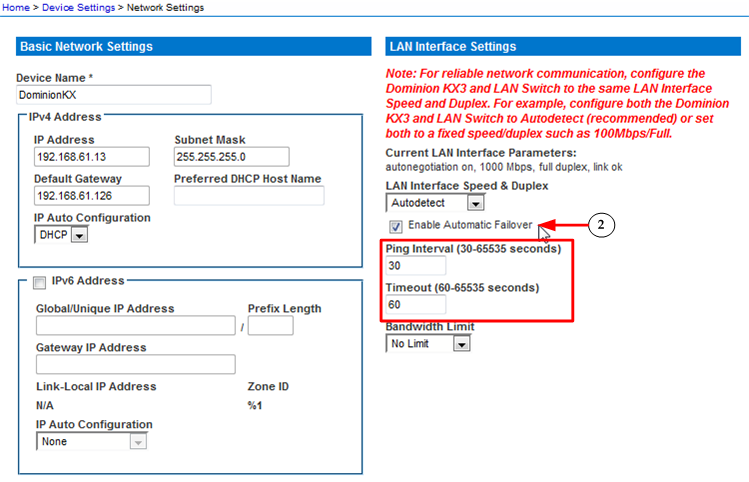
Selecting the Enable Automatic Failover checkbox allows the KX III to automatically recover its network connection. To do this, it uses a second network port if the active network port fails. Note: Because a failover port is not activated until after a failover has actually occurred, Raritan recommends that you either not monitor the port or only monitor the port after a failover occurs. When Enable Automatic Failover is enabled, the Ping Interval and Timeout fields are enabled. Configure the ping interval and timeout to best meet the local network conditions.
Click OK to apply the setting. |

Step |
|
|---|---|
|
Change the Bandwidth Limit, if needed. The default is No Limit. This sets the maximum amount of bandwidth that can be consumed by the KX III device (for all sessions). Note: Lower bandwidth may result in slower performance. Click OK to apply the setting. |