![]()
![]()
![]()
![]()
|
|
|
|
|
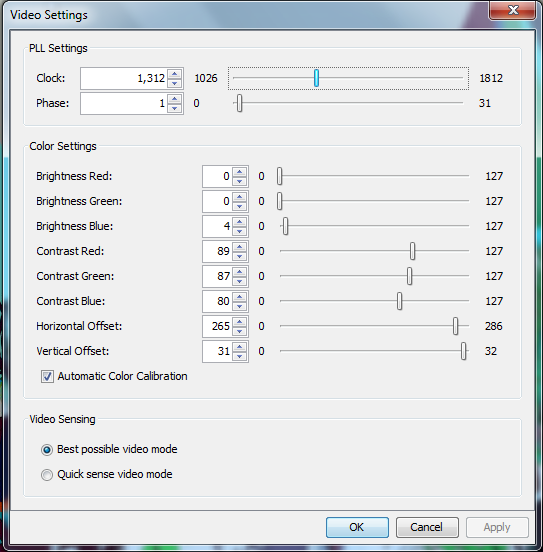
Use the Video Settings command to manually adjust the video settings.
Clock - Controls how quickly video pixels are displayed across the video screen. Changes made to clock settings cause the video image to stretch or shrink horizontally. Odd number settings are recommended. Under most circumstances, this setting should not be changed because the autodetect is usually quite accurate.
Phase - Phase values range from 0 to 31 and will wrap around. Stop at the phase value that produces the best video image for the active target server.
If the video image looks extremely blurry or unfocused, the settings for clock and phase can be adjusted until a better image appears on the active target server.
Warning: Exercise caution when changing the Clock and Phase settings. Doing so may result in lost or distorted video and you may not be able to return to the previous state. Contact Raritan Technical Support before making any changes.
The device will perform the full Auto Sense process when switching targets or target resolutions. Selecting this option calibrates the video for the best image quality.
With this option, the device will use a quick video Auto Sense in order to show the target's video sooner. This option is especially useful for entering a target server's BIOS configuration right after a reboot.
Note: Some Sun background screens, such as screens with very dark borders, may not center precisely on certain Sun servers. Use a different background or place a lighter colored icon in the upper left corner of the screen.